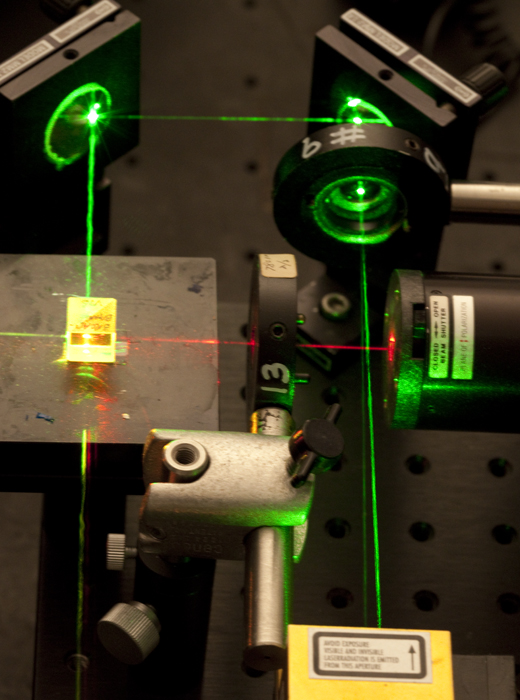
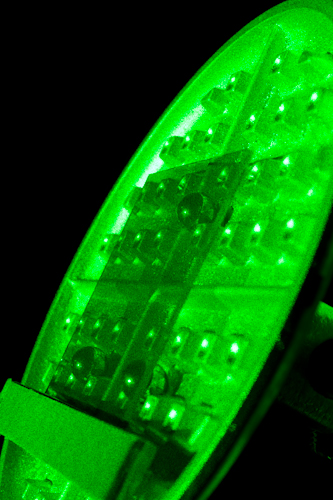
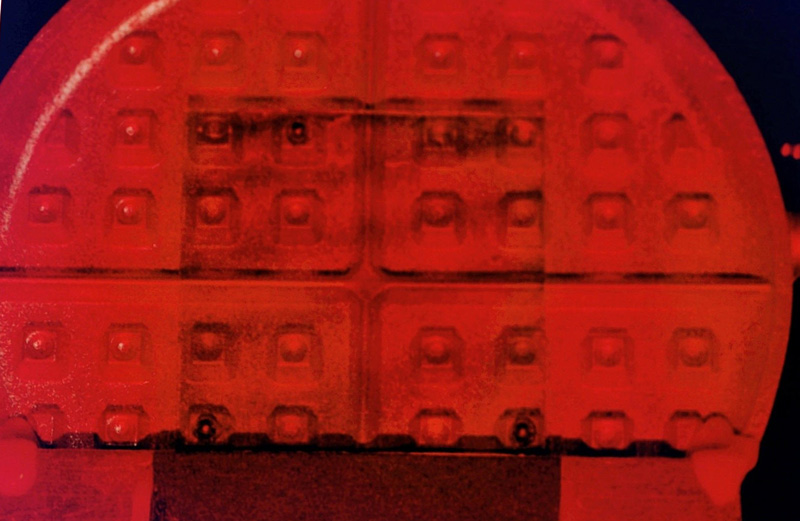
For researching holographic recording materials I have a Standard Single Beam Reflection Test Object, a silver spray painted waffle iron mold. This object presents a not very deep texture which is homogenous throughout the exposure test quadrants. Plus it's fun to look at the pseudoscopic side because it looks like the waffle. The holographic plate sits on three ball bearings glued onto the waffle iron. A bar prevents it from sliding down and blocks light from entering the edge of the plate, which could result in colored bands of internal reflections along the top edge of the plate.
The iron mold is supported in a kind of goal post arrangement so that it can be tilted to give a decent reference angle, which was about 30 degrees from the normal in this case to prevent the shadows of the waffle texture from getting too long. A support from the bottom prevents it from falling/rotating during exposure. Notice that in this configuration the holographic recording is upside down from the holographic replay.
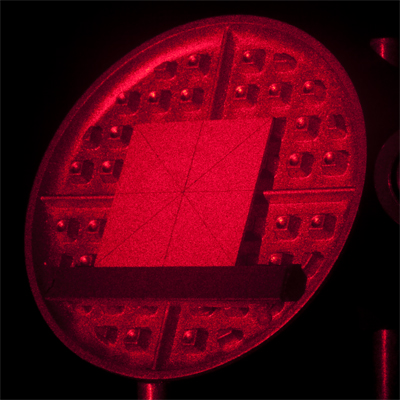
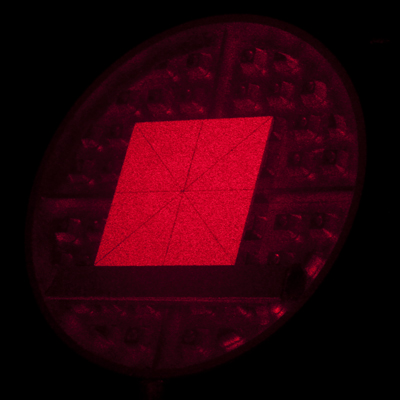
The figure below shows the rig with a plate processed to replay laser red replaced back into its exposed position and illuminated with the laser, generating real-time interferometric fringes, demonstrating the stability of the kinematic device. The reflections on the ball bearings aid the repositioning. Give it a try, it's not that difficult!
Maybe every holographer could make their own waffle iron test object similar to this one so that at future symposia of display holography everyone could whip out their holo-waffles to really see whose films and processing really are the best. The waffle is a universal breakfast food, so that everyone in the Global Coterie of Holography could find one to use in a thrift shop.
Not only is good coherence important for generating strong interference fringes, but the two interfering beams should have their polarizations vectors aligned. Most of the objects doomed to be holographed are diffuse reflectors, but who says that diffusely reflecting objects can’t preserve polarization?
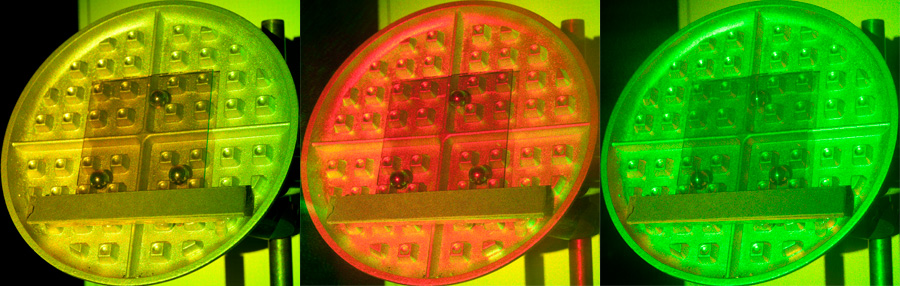
A polarized Helium-Neon laser illuminates the Standard Single Beam Reflection Test Object which is photographed through a polarizing filter aligned to pass vertical polarization vectors. The polarizing filter is rotated 90 degrees, and the diffusely reflecting white painted Target Card photographs well, since diffuse reflectors scramble the polarization vectors, but the Test Object dims out, since its reflection is polarized orthogonally!
The secret to the polarization preserving object is the paint; Krylon #1401 Bright Silver and others of this ilk use tiny aluminum flakes as the “pigment”, and being metallic, they are specular reflectors which preserve polarization. The flakes are so tiny that their orientation preserves polarization while conforming to the diffusely reflecting surface underneath. Be aware that some brands of paint dry more specular, looking like polished chrome, which doesn’t look that good for this purpose.
Those who are more advanced might enjoy this: He-Ne red and Frequency-doubled YAG green beams were made collinear using a polarization preserving broadband beamsplitting/combining cube. This results in the two beams being polarized at right angles to each other, and in this case the red beam is (p) polarized which turns out to be horizontal, and the green’s (s) polarization is vertical.