How does the holographer determine if the optimal exposure is found? What are we looking for? For this exercise it is assumed the neophyte holographer is using the prepackaged chemistry kits from Integraf or Photographers’ Formulary called JD-3 or JD-4, as when processed properly the color of a SBR is the same as the laser color, which can aid in the evaluation of the exposure. These kits employ development followed by a rehalogenating bleach, which preserve the dimensions of the recorded interference fringes. (For more details, see CWC2.) Using JD-1 or JD-2 where the processing results in a color shifted image gets more complicated, because a green image appears brighter to the eye than does a red, even though radiometrically (absolute energy measurement) the red might weigh in brighter! Plus there are other interesting tricks than can be done if the color is not shifted! In the figure below the reflection hologram is illuminated by a laser during reconstruction, and the hologram "steals" the light and transforms it into an image wavefront, depleting the straight through beam and casting a shadow. The darkest shadow shows the greatest efficiency or brightness.
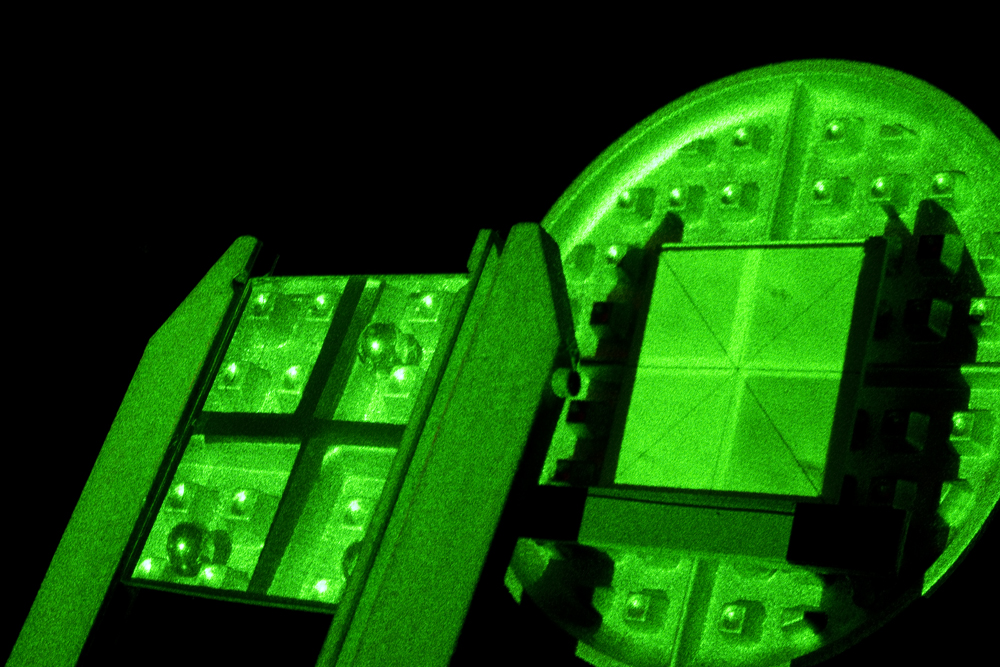
Here the hologram is held in front of the object, with an alignment card in place of a plate on the object. The image is apparent in the hologram since it is held at the appropriate reconstruction angle. Where there was no exposure, the blank areas in the test strip, looking dark in the holo, is where the maximum amount of light passes through the devloped plate, making the bright cross on the target card. In this orientation, the minimal exposure is in the lower left, and its shadow is the weakest, showing the minimal amount of diffraction efficiency, although still a healthy amount. The exposures increase CW from there, and you can see that less than half the light passes through the maximum exposure step, meaning that more than half the light is turned into image light! This was a BB-520 plate from HRT of Germany, (now Colour Holographics of England), developed in BBAA and bleached in a FeEDTA solution. Exposure doses were 400, 800, 1600 and 3200 microJoules per square centimeter. CAUTION! Some holographic materials cast deeper shadows not because of high efficiency but because of "noise", a cloudy haze precipitated by scatter from relatively large grain sizes.
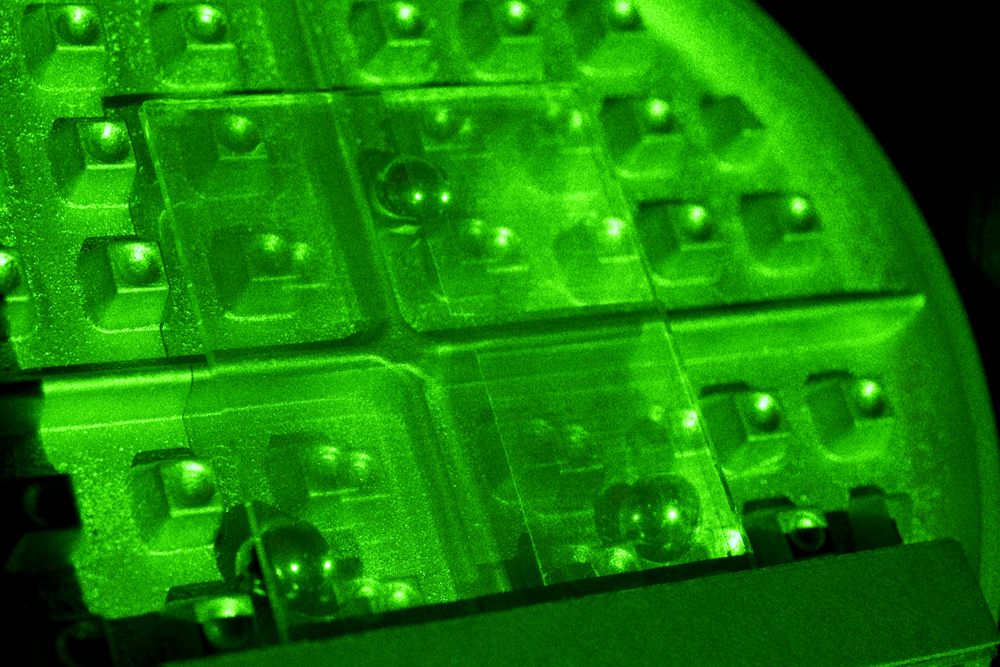
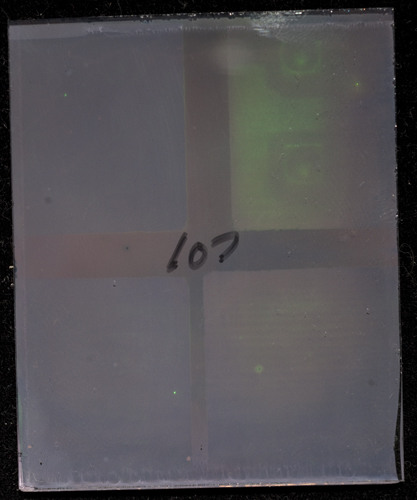
A quicker variation of the above scheme is to replace the plate on the object slightly displaced. Here you can see the image is brighter than the object in a couple of quadrants!
With photographic prints, an exposure will yield a print that is unacceptably light at the minimal exposure, then gets darker with more exposure, with the shadows filling in and detail filling in in the highlights, until there is too much exposure and the shadows block up and the highlights become light grey instead of having just the touch of density to give shading.
In a holographic test strip, what will be observed is that the image will get brighter and brighter, but after a certain point the shadows will start losing contrast and not look very dark black but take on a powdery look, caused by crystals that were over-exposed and should have not been developed.
Simply looking at the hologram with a black backing, velvet or velour is best as their fibrous nature is a good light trap, and seeing the where the brightest image occurs. In the example above, a Kodak 18% reflective Grey Card is on the right for comparison purposes. Notice that there are 8 steps to this exposure test.
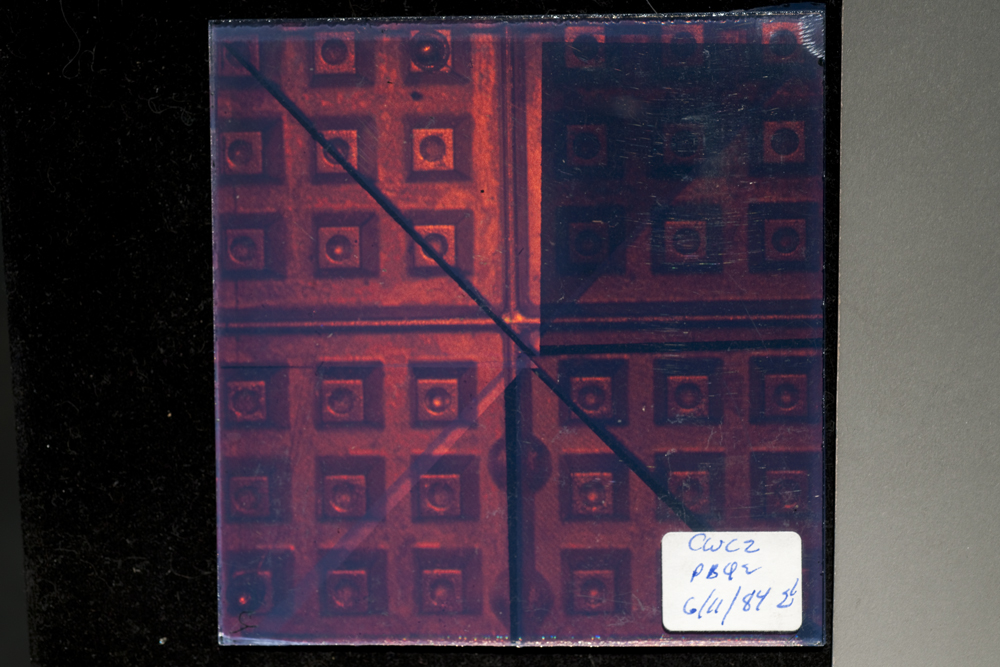
If attempting this for the first time, the first best guesstimate may be grossly over but more than likely under-exposed. In the sample below the upper left exposure, the longest one in this case, is above threshold and all the rest are under threshold. Notice that this one was shot with a less than full plate spread, so you can see the exposure fall off due to the non-uniform Gaussian beam profile. The next shot should start with this longest exposure and go higher and higher.
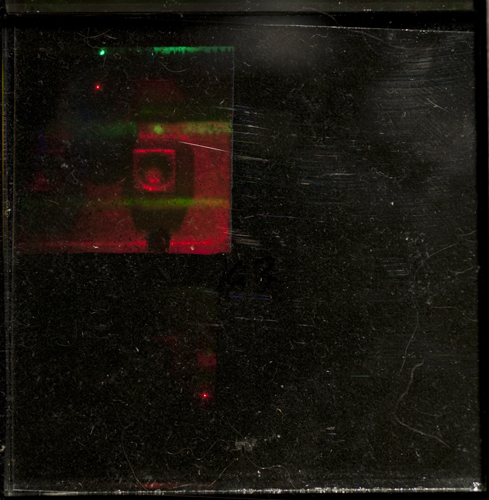
This one on the other hand was very much over exposed and/or over-developed. For the next trial, start with the lowest dose and work downward. There is such a thing as too much!
The student will realize that they have arrived at the best possible exposure time when the image pops out, and the viewer doesn't have to squint and squirm to see what's behind the glass. A properly exposed plate will reproduce an image that looks solid, and without a haze that makes it look like it's underwater. Comparison to commercially available holographic images (but not the embossed ones on foil, nor the dichromated gelatin types, but other silver halide based materials) might prove surprising!